Showing posts with label batrep. Show all posts

Wednesday, September 28, 2011

Old Witch vs Borka 35 pts

Going into this match I was 0-10 with the Old Witch hungry for my first win with her.  Played against Steve tonight who brought out Borka.  His list looked something like this:
  • Borka
  • Mauler
  • Bomber
  • Kriel Warriors
  • 2 trolls carrying a pillar
  • 1 troll with a big rock
  • some burrowing ones
  • some other support models
I ran this 35 point list:
  •  Old Witch
  • Behemoth
  • Scrappy
  • Min Mechaniks
  • Great Bears
  • Widowmakers
  • Widowmaker Marksman
  • Manhunter
  • Winterguard Rifle Corp
  • Joe
We played Kill box and there were a few linear obstacles in the middle of the field; some crates.  I had a forest near my deployment zone on the right.  Steve had some giant crystal obstacles in his corner and we both had some ruined buildings in are other corners.

I forgot to bring my camera :( but will give you a summary of the battle.

Steve went first and ran everone up to the middle of the board.  It was a pretty intimidating sight as I was outnumbered.  His Kriel Warriors got Iron Flesh which got their Def up to 17.  They were deployed to my left.  In the middle he had his Mauler and the Bomber run up with support solos in the back.  Over on the right just in front of the woods he sent his burrowing dudes.

My I had the Widowmakers advanced deployed on the left and they took aiming shots at the front line Kriels and needing 8s they all missed!  The marksman was nearby and I think he was able to take one out but he feigned death so I wouldn't be able to target him.  Thought that was pretty cool.  Over on my far left my Manhunter stayed were she was just out of charge range of the Kriels.  I advanced my rifle Corp up and with boosted shots they killed maybe 4 of the burrowers and took some shots at the Kriels maybe downing one or two, not totally sure.  Scrappy ran to the left near the Widowmakers and OW teleported near him.  I was thinking that I might feat but I wouldn't catch the Mauler or the Bomber so I saved it.  She put Murder of Crows in front of the Kriels to block all charge LOS to the Widowmakers.  Behemoth also ran to the left.  Now there was a forest on my right and basic Augury tactics would say I should camp the Behemoth back there.  Not sure why I chose to not use the forest.  Maybe I was afraid of the burrowers because I wasn't quite sure what they could do?  Mechaniks followed Behemoth.

Bomber decides its time to throw some barrels and lobs two into the Rifle Corps taking out four, just one shy of a command check.  The Mauler moves up a little.  Over on the left the Kriel Warriors run around the Murder of Crows and a few engage my Widowmakers who were all base to base lol.  Another runs to engage my Manhunter.  The surviving burrowers burrow underneath of the forest and the rest of the Troll army move up just slightly. 


I would definitely be feating this turn and there were a bunch of things I could do.  I had the Kriels engaging my Widowmaker and Manhunter.  Scrappy was in charge range of the Kriels but I could also possibly advance him to the right where he could arc gallows to one of the Warbeasts.  My idea was to put Avatar on Scrappy and have him dance through the Kriel Warriors.  Hopefully that would take him close to the Murder of Crows where the OW could teleport to and Feat.  If she could do that, she would catch nearly the entire Troll army, be behind the Kriels and none of them could move or face a POW 14.  There was only one problem though; Scrappy didn't have Avatar on him so there was no way for OW to put it him, have him go crazy, and then teleport.  So I went with plan B.

Rifle Corp did what they could and cleared out some of the Kriels.  Manhunter missed her two attacks needing 7s.  Behemoth did more bombard shots on the Bomber with little damage.  Bears were in a bad position and fearing a big POW 16 from the Bomber, I spread them out and got them ready to counter charge stuff.  The Widowmakers opened a lane for Scrappy and they attacked the Kriels in melee but with MAT 4, yep not much happened.  So Witch moves a little, puts Avatar on Scrappy and Feats.   My thinking is that the Kriels don't have reach so even if Scrappy fails at his Avatar run, nothing can charge him or move towards him.  He charges a Kriel and I boost the first hit and needing 8s he misses.  I take some chances on unboosted 8s to hit and miss some.  He buys his last attack and kills the first one he charged but with the free attack fails to hit the second one.  

Unborrowed dudes pop up and charge a Mechanik and the Behemoth.  One Mechanik dies.  Bomber steps up taking the POW 14 (with little effect) and aims a bomb that deviates onto a Bear and a Widowmaker.  Bear survives but Widowmaker dies.  The second shot takes out more Rifleman bringing the unit down to two.  Mauler charges scrappy and annhilates him easily.  I may have forgotten to check for the Feat Turn POW 14.  Kriel engaged with Manhunter kills her and another on the Marksman kills him.  Supports along with Borka move around the center crates going way around the Murder of Crows.  The Trolls are closing in and the OW is backed into a corner.

Joe starts off next, calls boosted attacks and takes out one of the Pillar Trolls.  The remaining Rifle Corp take shots.  Can't remember the result but I remember what happens next because it's the stuff of legend.  Witch goes, puts Iron Flesh on herself and then the Great Bears charge.  One charges the Mauler and standing on the wrecked armor of Scrapjack proceeds to roll QUADRUPLE SIXES for damage!  With one swing he took out half of the Mauler's boxes.  The second swing also hits but isn't enough to bring the Beast down.  Another Bear charges the Bomber and takes out his Spirit.  Volkov runs inbetween both bears to keep everyone in command.  In hindsight, I should have charged him at the Mauler, which should have finished him, but I was worried that the other Bear would be out of command.  Mechaniks charge the Burrowers and the two remaining Tough!  Behemoth takes more aimed shots into the Bomber for little effect.  (he did this before the Bears charged).

Next turn the lone surviving Widowmaker falls to the fast approaching Kriels along with two of the Bears.  It's all up to the Mauler.  He charges into the OW with a few buffs and with his first swing misses!  He needs to roll 12s on three dice and buys his last attack.  It hits!  The Mauler then does an insane amount of damage and eats OW and heals a bit for a GG.

It was a really, really, enjoyable game on both sides, a truly epic fight.  Made a few mistakes here and there but overall I'm happy with the way I played and learned a lot in the process.  Here are some thoughts:
  • starting with the Widowmakers.  I shouldn't bunch them up like that.  One problem was that they blocked LOS for the Rifle Corp.  And then when the Kriels ran to engage them.  It only took two Kriels to engage the Marksman and three Widowmakers.  Should defnitely space them out more.  And oh man was I waiting for the Widowmakers to hit so I could call Sniper!  But they all missed their shots :( And!  If they hit they would have had Swift Hunter too.  Like having them in my list.
  • Manhunter was kinda meh.  She should have killed that one Kriel and would have been protected under OW's feat which would have allowed her to charge again.  But she died.
  • Rifle Corps.  Really liked them.  Range 14 is awesome and with boosted attacks were able to hit most of the infantry.  Could have probably spread them out a bit more to help with the Bomber's AOEs.  Didn't use suppressing fire once but after talking with Steve post-game will try to use that next time.  It works well with Murder of Crows to control the board and it can allow the rest of my army to move up and get into position.  Also, it might be used to funnel troops which would be good for Behemoth's AOEs.  It felt good using the Rifle Corps and will definitely use them again the next time I bring OW out.  
  • Behemoth.  Kept him pretty far back and sadly only used him for bombards.  I should play him more aggressively and get him into a position to charge.  Gotta make use of those armor piercing fists!  Also could have used the forest for cover and rain bombards all day from safety.  
  • Getting better at positioning Scrappy for an Avatar run, especially on feat turn where he is safe to move up.  Turning point of the game was when I lost him to the Mauler's charge though.  Without Scrappy, Old Witch loses a lot of her options-- can't teleport for manueverability, tougher time using Gallows.  And just not having Scrappy sucks big time as there are no more opportunities for save Avatar runs.  So next time just gotta be aware of enemy threat ranges.  That was on my lists of things to be aware of and I forgot lol--" Don't let my 'Jacks get charged."
  • Mechaniks didn't do anything in the game and I'll probably swap them and the Manhunter out for possibly the Ternion.  Clouds to grant prowl to OW and Scrappy and to maybe give the Widowmakers +4 DEF with Camo.  Sprays will also be helpful and also Ice Cages.  So I think they are definitely better than a Manhunter + Mechaniks.  Other option is maybe Aiyanna & Holt to help with dealing damage but I'll give the Ternion a shot.
  • Great Bears spend the opening turns in the back and I swung them left to get away from the Bomber.  That one charge on the Mauler Steve and I will never forget.  Could have gotten the third to charge but other than that I feel my positioning was alright.  Ya, when the charge, I really need all three to hit.
  • Old Witch.  I felt my positioning was ok in this game.  She was safe for the most part in the beginning and close enough to the front line to make use Murder of Crows and her feat.  She was backed into the Killbox corner though which limited her options late.  To do it differently, perhaps a bit of board control to lock down the center and get my models into position.  With Suppressing Fire in combination with Murder of Crows I might be able to hold Infanty back and save my feat for the following turn.  Taking the center aggressively and using this type of board control will keep the enemy away from the Old Witch and give her room to operate in the back.  
Thanks again to Steve for the game.  Was lots of fun!  Next week Tuesday our club starts the much anticipated Journeyman League and we're all looking forward to that.  I've also scheduled a game with Chris and his eSkarre list and I'm really looking forward to playing her.  Will give me something to study and prepare for this week :P

Sunday, September 11, 2011

Club Tourney

Had a blast today at our club tourney-- 35pt Steamroller, 2 lists.  We had about 11 for the tourney, somewhere around that number and got to make some new gaming buddies today which was really cool.  I had a pButcher list but ended up playing eSorscha the whole day as I had a little more experience with that list recently.  Here's the list:

eSorscha
Spriggan
Great Bears
Max Kayazy + Underboss
Max Wingerguard + UA + Joe
Gorman
Aiyanna and Holt

eSorscha I find is just a good all around caster.  This army has the Winterguard sprays to take care of infantry and anti armor duties fall to the Great Bears, Spriggan, and also use of Sorscha's feat which doubles damage over armor.  A&H and Gorman are there to help the units do even more damage on feat turn.  Sorscha also helps the Winterguard a lot by giving them +2 movement and rerolls on failed CRAs which is awesome (forgot about that one in games).  Here's some batreps.

Game 1
Faced off against Max who brought out eNemo with Thunderhead, Stormclad, Ironclad, two Stormsmiths, Arlan, Squire, and a min unit of Stormblades.  Scenario was Destruction.

Max was unlucky in deployment because he got some deep water near his deployment zone which is bad because if infantry step in it they take a wound and 'Jacks will go inert.  So he had to split his force a little with the Ironclad off to one flank; also because he didn't want it taking damage from the Thunderhead's Pulse.

My infantry advanced and I had Winterguard on the right against the Ironclad, a Stormsmith and Arlan.  Kayazy was opposite the Thunderhead with the Blades protecting his front.

Key moment of the match was when I was able to get a Winterguard out of melee with the Ironclad with DEF 17 and do a boosted spray down the entire line of Stormblades, wiping out the unit.  Max forgot to add +2 to the free strike hit which would have hit the Winterguard; I didn't catch that either.  After that the Thunderhead Pulsed a group of my Winteguard and then Sorscha feated and Juggernaut (forgot to put Spriggan in), the Bears, and Winteguard CRAs wrecked Max's heavies.  With the main army taken out Max conceded after that. 

It was the first time that I got to play Max and he is a lot of fun to play against; great opponent.  Hope to get more games with him in the future.

I've faced the Thunderhead Ball before with Thunderhead and Stormblades in front of him (Ben's Cygnar) but this was the first time I was able to use the Winterguard.  My strategy with the Winterguard was to "try" and stay out of Pulse range and hopefully do a lot of two man CRAs at POW 14 and dice-4.  Hopefully that would chip away at heavy 'Jack armor. 

Strat for the Assassins was basically stay the heck away from the Thunderhead.  Pulse will auto kill Assassins and running to engage the Ball was not an option because I would get Pulsed.  Charging would get me some kills but I would still get Pulsed.  Actually, I don't know what I was going to do with the Assassins but I tried to keep them out of charge range of the Blades and let the Winterguard slowly pick away at the army. 

Game2
This was against Glorious, another Cygnar player and he brought out Kraye with Cyclone, Defender, Stormclad (?), Gun Mages + UA, Arlan, Squire, and at least one Stormsmith.  This scenario had two flags in the center.  Someone had to score on flag #1 before flag #2 could be scored against.

Glorious had ATGM behind a wall on the left next to the Defender and Stormclad.  Cyclone off to the right with the Stormsmith.

I advanced the Winterguard with Desperate Pace and Iron Flesh to go after the first flag on the left and hopefully reach the ATGMs.  With their high DEF they were able to survive their gunfire from eventually reach them with boosted sprays and blunderbuss shots taking out more than half the unit. 

In the middle, Glorious' Defender had its way with my Spriggan with it's sick range and POW 15  gun.  But Glorious had a dilemma as the ATGMs couldn't really take the flag so the burden fell to the 'Jacks.  The Defender eventually walked up to contest it and my Spriggan was able to charge it and wreck it.

Over on the right his Cyclone faced off against the Assassins and laid down some suppressive fire templates to block the Assassins.

Eventually, Glorious pulled both his 'Jacks to the left to fight the Spriggan; the Stormclad bringing it down.  But then Sorscha feated and got the two remaining Cygnar Heavies in her control.  The Assassins swarmed the Cyclone and a Bear charged the Stormclad and also the Cyclone.  Both were wrecked.  With his 'Heavies gone, ATGMs below half strength and no way for Kraye to reach Sorscha, Glorious resigned.

One thing I thought that Glorious could have done was maybe hold the Defender back and have it just pound away at the Spriggan.  It would take me a while to get to him and in my experience, anything the Defender focuses on will go down, especially Khador Heavies.  And then the Stormclad could contest the flag.

Glorious was another great guy to play against.  First time we played against each other.

With round 2 over I was 2-0 and would go against another 2-0 player, Steven.  Getting a little sleepy so I'll continue that and the next game tomorrow :D 

Friday, August 26, 2011

Warmachine Batrep: pButcher vs Kraye 35pts

Tonight I planned to teach one of my friends Warmachine.  He recently moved down to Irvine and is staying with Ben.  So I packed up my bag and figure I'll let him try pButcher out with maybe some Great Bears and a Jack or something like that.  Well, I get to Ben's and our friend is on the phone so Ben decides to sneak a game in!

We decide to play 35pts Jacks and only Solos.  He brings;

Kraye
Squire
Hammersmith
Defender
Stormglad
2x Hunters

I've got:

pButcher
Behemoth-- proxied by the Marauder :(  
Juggernaut
Spriggan
Kodiak
War Dog
Widowmaker Marskman

I don't know why I brought the Marksman but I like him a lot and I figure he could flank and possibly get to Kraye.

The board had two wheat fields in the center of the board as rough terrain and two walls on the sides.  This is going to be really tough for Butcher, like REALLY tough.  All I have is the Behemoth who can shoot a pair of bombards but Ben is sporting a Defender and two armor piercing Hunters, not to mention  I've got two fields of rough terrain to traverse.  This is going to be brutal.

Opening of the game had me advancing behind my wall of Jacks while Ben focused all his efforts into trying to bring down the Behemoth.  I've been in this fight before and it's just a matter of time before the Defender takes down the Behemoth's subcortex.  But now I also had to face two hunters...  The Behemoth was operational for at least two rounds and got some shots off on the Defender and one of the Hunters.

I feated fairly early when I noticed I would be able to catch both Hunters.  Butcher advanced to one of the Hunters and cast Obliteration which wrecked it.  Behemoth walked up and lobbed a shot at the other nearly crippling it's gun arm.

My plan was to try and take out his long range guns so we'd have to fight in melee-- something my army is better equipped for.  Well, one Hunter down.

Ben now runs his Hammersmith who has some kind of spell on him that doubles it's speed.  It blocks and protects the surviving Hunter.  He swings Kraye down the right flank and the Defender starts to head over to the left.  My force is in a tight formation in the center and I'm slowly being encircled.  More shots rain down on the Behemoth and he's wrecked between the fields.  If I stay out in the open I'm going to eventually fall to all this fire so there's only one thing I can do.  Run!

Well, not that yet.  Kraye is dangerously close to my Kodiak so I load up fury on him along with 3 focus.  My plan is to push the Kodiak with the Spriggan and then charge Kraye.  Little do I know that Ben has put Pursuit on the Kodiak which means that once he advances, Kraye will be able to move away and he has parry.  :(  We later checked and the Kodiak would have made the charge.  So the Kodiak vented steam and didn't move.  Spriggan advanced a little and took a shot at Kraye who had either one or no focus camped and was able to do a miracle 5 wounds on him.  Butcher was a little exposed sitting on no focus so Jugg pulled back to block LOS from the Defender.  One good thing came out of that round.  My Marskman, who had redeployed to the center, advanced in shooting range of the other Hunter, getting a shot off around the Hammersmith.  He crippled his shooting arm!  So only the Defender was left for long range.

Ben pulls the Defender back and it shoots the Spriggan for good damage.  He swings his battlegroup back to his back edge now heading for the other flank.  Not the right time for the alpha strike.  Kraye is sitting in the back with no focus so I think of something sneaky.

Butcher charges the Spriggan and I check control but I'm out of range for Obliteration.  I would have been at dice-2 with a fairly gutsy chance to win the game.  That was a real bummer and next turn I know I'm going to take the alpha strike and it's going to hurt.  So I run the Kodiak, who stilll had Pursuit on him (poor Kodiak) and Ben asks, "are you sure?" and advances the Defender down the left flank.  Not good.  As soon as I activate my next model Ben gasps.  Dog runs to the Defender and engages it in melee.  What Ben wanted to do was take a boosted shot and pButcher who was already damaged sitting on 10 life (I somehow forgot that).  But now the Dog posed a problem for him.  We'll get to that in a bit.  Spriggan tries his best to advance and block charge lanes in front of Butcher and the Jugg runs into the fields to defend what he can too.  Butcher has Iron Flesh and 2 focus.  In front of him is Spriggan and the Kodiak.  Marskman is engaged by the surviving Hunter in melee.

Here it comes.  Kraye feats and this gives his battegroup boosted attack rolls :(  Ben takes a long time to think about his moves and what to do with the Defender.  He decides to take a free strike and backs away from the Dog.  Dog hits and does 5 damage.  I need to roll a 1,2, or a 6 to cripple is gun arm.  I roll a 2!!!  Dog is amazing!  What's cool and even more irritating is that Ben moved the Defender out of melee range of the Dog so the Defender can't do anything!! haha.

But here come the heavy hitters.  Stormclad charges the Kodiak who is already a little damaged and wrecks him.  Next comes the Hammersmith who charges Spriggan and hits on his first two attacks which allow him to get off his combo but Ben elects not to do that because Butcher is close by.  He buys another attack and after all is said and done, Spriggan has one cortex box and a few on his right arm :D

Kraye advances along his back edge away from the melee that is taking place.

Butcher goes with Full Throttle and backs up behind the Spriggan.  Dog runs back towards the Butcher getting to within 3" of him.  <3 the Dog.  I think I may paint him next because of this game.  Spriggan on 2 focus attacks the Hammersmith and with 2 attacks nearly brings him down.  But Juggernaut just makes the charge and with his axe is able to wreck it.  That was huge as the Hammersmith was the main thing I was worried about.

Ben goes and advances the Hunter into the Dog and kills him, then Light Calvary moving it into the Juggernaut (Kraye makes all his 'Jacks calvary).  At this point I offer a draw to Ben as it's getting late.  He does want to play it out but after further thought accepts.

I had Butcher, an untouched Juggernaut, and an almost dead Spriggan going against Kraye, an untouched Stormclad and a crippled Defender.  I liked my chances because I could slow advance with the Spriggan and as soon as Ben wrecks him, I'll counter charge with either the Jugg or Butcher.  But without Scenario or even Killbox or a timer, this game would have dragged on and I could have easily been lame and move Butcher to a wall or something so I thought a draw was fair and sporting.

The draw did feel like a victory though because of all the hammering I took in the beginning rounds.  It always happens against Cygnar gun lists with a heavy Jack list with pButcher.   There's no getting around it.  You'll feel awful, you'll take a beating, but more often than not, Butcher will make it to the End Game and then anything is possible with him once the heavy guns are off the table.  Perhaps that's why Ben took the draw.

He probably remembers this game pictured above where a fully camped Butcher with Iron Flesh ran through his entire army to bring down pNemo :P

Jack heavy is very hard to play with pButcher.  Against a shooty list, you have to run and be aggressive because you absolutely have to get into melee.  Take care of his anti armor weapons and eEiryss or things that have upkeep hate and Butcher should be good in the later rounds, if he survives until then.

I haven't played him with the Winterguard surprisingly but I'd like to run a list with Winterguard, Assassins, and Widowmakers.  Fury is good for both infantry and Jacks and he has Iron Flesh for DEF.  Feat turn will be killer too.

Our friend ended up watching the game and he's very interested.  He said it was actually fun to watch the game and is looking into either Trolls or Skorne.  All in all, a fun night.

Wednesday, August 24, 2011

Warmachine Batrep: Old Witch vs Harbringer 50pts

Was supposed to demo a game to a friend but couldn't reach him so ended up going to my gaming club and got a game in with Patrick at 50pts.

Patrick was looking for some revenge as I've beaten him the last 4 or 5 times but I have to say he helps me a lot in my games when I forget things.  He brought Harbringer and had something like this:

Harbringer
Avatar
Reckoner
2 Vassals
Choir
Piper
Errants
Daughters
Aiyanna & Holt
Gorman
eEiryss
Anastasia

I brought the Old Witch and had:

Old Witch
Scrapjack
Beast-09
Spriggan
Full Winterguard + UA + Joe + 1 Rocket
Full Kayazy Assassins
Aiyanna & Holt
Gorman
eEiryss
Widowmaker Marksman

I can't remember the specifics of what happened each turn so thought I would give a summary and talk about how each of my units did in the game and what I learned.

The Game

Scenario had two vertical control zones in the center and you earned a point for controlling one.  First to two points and more than your opponent wins.  We each had a wall and forest on our sides of the board at the outside corners of the zones.

I deployed with Witch and Scrapjack favoring the right where the forest was.  Jacks in the center with Winterguard on the left and Assassins on the right.  Gorman and Aiyanna & Holt were near the Old Witch behind the Jacks.  eEiryss advanced deployed on the outer left and Marksman on the outer right; thought that was pretty cool :P

Patrick had Harbringer opposite corner from the Old Witch, his Jacks in the center with supports.  Errants opposed the Winterguard on my left and the Daughters facing off against the Assassins on the right.  Piper was with the Errants and eEiryss was with the Daughters and Aiyanna & Holt nearby.

To summarize the game.  We both advanced towards the center and Patrick feated first holding most of my infantry at bay with a few of the Winterguard in the left zone.  I sent the Assassins forward and counter-feated with Witch.  It protected the Assassins from the Daughters which was good and forced the Errants to swing left to attack the Winterguard.

I pulled Eiryss from the flank towards the center fearing Anastasia and she spent most the game disrupting my own Jacks.

Winterguard tarpitted a little but Patrick cleared the ones in front of my Jacks and the Reckonner charged Beast-09 doing a considerable amount of damage.  I countered with Beast but it wasn't enough to bring down the Reckoner.  Spriggan walked up to the Reckoner and with his Lance rolled a 3...  Out of range for his shield arm so Reckoner lived.  He scrapped Beast and the Avatar charged Spriggan nearly killing him.  I could have attacked with Spriggan and done an awful lot of damage but my own Eiryss distruputed him TT.

Forgot to activate Joe before the Winterguard on a key turn when most of the Winterguard were spraying the Errants.  It was bad.  Errants ended up clearing most of the Winterguard and scored a point in the left zone.

Assassins were doing okay against the Daughters but on a crucial turn I ran out of time as they charged the whole flank; getting into melee with Aiyanna and Hold and Eiryss as well.  Not only was I not able to attack but the Underboss was so far back that half the unit was out of formation.

The disruption on my Jacks (even Scrapjack was disrupted) took the wind out of me and with no real way to win I conceded the game with the Avatar just steps away from the Old Witch.

Analysis of My Units

Assassins
Always fun to use and in my battles with Patrick he always advance deploys the Daughters against them because he doesn't want them going against the Winterguard.  Usually they battle it out for most of the game and my Assassins do pretty good because of their sick DEF in melee and with Gang they are able to take out the Daughters.  But, the Daughters usually do stall my Assassins because I chose to get bogged down and fight.

In this game, there was a lot for my Assassins to attack; besides the Daughters Patrick sent eEiryss and A&H after them.  Still, I feel I should be running my Assassins to the back rank of Patrick's line, where stuff like the choir and Vassal are.  I'm thinking I need to run at the Daughters and then continue running through them by mini feating or just parrying off.  If I engage in two waves, the first wave can hit then move on and then the second wave can hit.  Goal might be to keep pressing forward and pressure his support units.  Well, if Patrick is reading this he knows what I'm going to do next game :P  Ya, my general feeling is they need to pressure more not just fight with the Daughters and keep moving.  Really like the unit.

Winterguard
The most basic lesson to learn; activate Joe first.  Even if he's going to give them Tough, just activate him first for good practice.  It's easy to forget this when you're mind is focused on all the sprays your Winterguard are going to do but guess what; The sprays won't be as effective without boosted attacks.  Happened to me on a vital turn in our game when I had the Piper, Gorman, and a handful of Errants in spray range.  A simple mistake like that can cost you the game for sure.  So gotta remember-- Joe first, Winterguard second.

Winterguard fought the Errants and man the Errants are hard to bring down.  I believe when one takes a fatal wound, Patrick can decide which of the Errants dies.  So this leaves his front line intact while he removes the backside ones.  It really felt like I was fighting 20 Errants.

One thing I have to learn is when is it best to spray vs. CRA vs. normal shot.  Topic for another post.

Beast-09
I allowed him to get charged by the Reckoner which nearly killed him.  No one EVER shoots Beast for fear of the free advance he gets and I haven't used his Imprint yet...  He does kill whatever he attacks but then I could have had a Juggernaut do that for 4 points less.  Beast does get to run for free though which is really nice.

Spriggan
Didn't really get to do much this game but wow he missed a vital attack when he needed a 4 and rolled a 3.  That would have wrecked the Reckoner.  Did get to fire some grenades.  I do like having that extra armor and he is brutal on the charge.  Haven't gotten the opportunity to use his flares yet but I like Spriggan.  Bulldoze is very handy too.  I may prefer him over Beast but they do make a good pair-- Beast can bring anything down and with his Imprint can decimate infantry.  Spriggan has great utility and he hits about as hard as Beast.  Both lack range.

Scrapjack
I have a lot to learn with this guy.  Upkept Avatar of Slaughter the whole game but really didn't get to attack infantry which is what Scrappy does best.  I didn't use him at all this game.  He sorta just hung around the woods.  At the very least he could have charged some Daughters to free up my Assassins then get teleported back to Old Witch.  Definitely have to think more about his use and tactics.

eEiryss
So... big lesson; don't run her near your Jacks or they'll be disrupted!  That can really screw you when you either need to charge or load up a 'Jack before a big attack.  Keep her wide or in front of the Jacks.  She did okay this game working with the Marksman against some Errants.  She's another one that I have to learn to use.  Did get to knock of Fear of God from my Winterguard.

Widowmaker Marskman
I really like this guy and every time I've used him I've been happy with his performance.  He's just very reliable.  RAT 8, POW 12, Stealth and Hunter.  All of these things set him apart from Widowmakers (even though he gives Widowmakers Hunter)  He took up house in the woods and shot at Errants all game.  Had him shoot at Aiyanna but she had Stealth ><  Would like to bring him in more lists especially with Widowmakers.

Aiyanna & Holt
May have used her Kiss but forgotten to count it on my roll.  Need to get Holt in the action more as he is a B@D A$$.  He's accurate like the Marskman and boasts DEF 15.  So good.  Aiyanna can protect them with Stealth so I should be a little more aggressive with them.

Old Witch
So after playing a handful of games with her, I still have a lot to learn.  She has a lot of ways to help her army; not necessarily by enhancing their attacks but by supporting them through denial/board control and helping her army with terrain.

She can block LOS with Murder of Crows which pervents range shots and charges.  Could use this in front of infantry or on my Battlegroup Jacks to prevent attacks.

Weald Secrets I haven't used a lot and I think I should.  Gives not only Pathfinder but Camouflage.  This is huge.  Park a 'Jack behind cover and hello DEF 16 Khadoran 'Jack.  Allows 'Jacks to charge through forests to sweat.  Wow I really gotta make use of that.  Gorman can put a cloud on a Welded Secretive 'Jack which will make them DEF 14 to range.  Oh Witch you... I'm starting see some things.  Gonna need another post for Old Witch specifically to theorymachine all this stuff.        
    

Wednesday, July 20, 2011

Warmachine Batrep: eSorscha vs Terminus

Spent the night hanging out in the beginning then got a game in with Coco, one of our resident Cryx players.  He and I have never played before and it was his first time playing 50 pts and Scenario.  We rolled and got Overrun which has a big rectangular control zone in the middle of the board.  You score at the bottom of the second if you control it and your enemy isn't contesting it.  Here are the lists:

50pts

eSorscha
Beast-09
Devastator
Winterguard Infantry
-Officer and Standard Bearer
-Two Rocketeers
Joe
Widowmakers
Great Bears
Kayazy Assassins (max) + UA
eEiryss
Gorman


Terminus (not sure about all the names and sizes)
Deathjack
Tartarus
Bane Thralls (min)
Bane Knights
Mechanithralls
Necrosurgeon & Stitch Thralls
2 Pistol Wraiths
Withershadow Combine
and guy who makes friendlies advance an inch. 


Terrain has three ruins spread out across the middle and a wall on each of our sides of the board to our lefts.  Coco won the roll and let me go first.  I put the Battlegroup in the center with Winterguard on the right and Assassins on the left.  The plan is pretty much to advance everyone up to contest the zone and hopefully get some rockets into his army.


He deploys on my left in a very, very, big infantry ball.  There was a lot of dudes.  Mechanithralls in the front on the left with Bane Knights behind them with Terminus.  On the right is the rest of the army with Pistol Wraiths on the far right. 


Widowmakers advance deploy behind the wall on my left with Eiryss also on the left near a building.  I want to keep her away from those Pistol Wraiths.


Deathjack deploys in front of Tartarus and some Bane Thralls just to the right of center.


I move everyone up, Winterguard getting Desperate Pace from Sorscha along with Iron Flesh to get their DEF to 15 (I forgot to give them the Bob & Weave order to get their DEF to 17...)  Shot with a rocket that scatters and misses.  Joe gives them Tough.  Widowmakers get Shatterstorm and one takes a shot at his front line Mechanithralls but they're out of range.  Can't remember what Eiryss did.  Assassins run around the Widowmakers heading towards the Mechanithralls.  Battlegroup heads for the center.

The Cryx army all move up in formation.

Upkeep Shatterstorm on the Widowmakers and they go to work on the Mechanithralls now in range of their guns.  Can't remember exactly but I box a few and manage to forget the Shatterstorm effect ><.  Eiryss also takes one down and at least one Toughs.  Assassins charge and two manage to reach the front line taking out a pair of Mechanithralls.  The rest run up and try to get into melee.  Over on the right the Winterguard get Desperate Pace again and I forget to activate Joe first (again) to give the Winterguard boosted attack rolls.  So bad.  Rockets take some shots deep into the Cryx army but scattering shots don't do anything significant.  Bears meanwhile continue their advance within the Winterguard formation.  Beast moves up and Dev steps into the zone.  Sorscha heads to the wall to get some cover behind the Widowmakers and I decide to put Iron Flesh on the Assassins because they're going to get into the mix soon.  Gorman pops smoke (more for practice as Coco's army didn't have range).

Cryx slow advances and Necrosurgeon brings back some Mechanithralls.  Terminus puts Malediction on himself and Coco begins his plan to tear through the front Assassins and get Terminus' armor up.  With Iron Flesh the the Assassins are sitting at DEF 17 because of Malediction and Terminus only manages to kill one of them.

Over on the right Deathjack advances and casts Annihilation on a Rocketeer but misses.  Things not going well for Cryx.  Pistol wraiths on the right continue to stream down the flank.

With Terminus open for attack, Sorscha pops feat getting Terminus in her command range; now any damage above armor is doubled.  On the right, Desperate Pace goes on the Winterguard and with boosted attacks (Brad reminded me ^^) advance very close to the Cryx line.  Rockets fire deep into his formation and hit a lot of guys but with Tough rolls only a few get boxed.  The Winterguard then open up with sprays and are able to take down a few of the Bane Thralls and even do one damage to Deathjack.  Bears charge DJ and one fails the charge running into a Winterguard.  One does reach DJ and hits only with his first attack doing something like 6 dmg.  On the left Widowmakers take down more Mechanithralls and Eiryss goes for a lucky shot into melee at Terminus but misses (we both forget that the missed shot should hit my Assassin).

Assassins pop mini feat (allowing them to pass through models) and 5 of them are able to charge Terminus with another already in melee with him.  With Sorscha's feat the Assassin's are doing good damage.  The Underboss attacks third and with his second swing is able to bring Terminus to the ground.

The night had me rolling hot and Coco rolling really cold (not counting those tough rolls hehe).  The attack of Terminus on the Assassins was really unlucky as he had to roll 7s to kill and he only was able to get one.  His plan was to get his armor up, heal him and advance him in a march of death.  The unlucky rolls along with Sorcha's feat allowed the Assassins to hit harder than usual and get the job done.

Speaking of Assassins, after having them face Arcane Tempest Gun Mages for weeks against eHaley or AOEs with Siege, it was refreshing to have the board clear of that kind of stuff.  They had the opportunity to get safely into melee where they can really shine.  <3 my Assassins. 

As for the Winterguard, I was able to get more practice with them and the more I play them the more I like their versatility.  There's a lot of things they can do.  In this game, Joe mainly gave them Tough but he can also give them boosted attack rolls which is a good speech to give on the attack.  Those boosted attack rolls really help the rockets and sprays to hit.  I just have to remember to get my activations right.  Sorscha needs to go before them to give Desperate Pace and Joe needs to go before them as well to give them boosted attack rolls.   

Joe would be a great target for the Pistol Wraiths.  Without him, the Winterguard are very, very average.  Another good target would be the Standard Bearer who gives them their sprays or the Officer who can give them the Bob & Weave order for +2 DEF.  Wow, now that I think about it, I really have to keep those guys safe. 

Windowmakers were able to take a lot of shots in the game but next time I have to remember to do the Shatterstorm result which creates a 3" AOE on a model that's boxed.  That can have good effect on tight infantry formations.

So overall I'm liking eSorscha a lot as I feel she has a nice balance between killing armor (her feat) and killing infantry (Shatterstorm).  She also can give Winterguard +2 movement and let them reroll failed CRAs which is really nice.  So far she is my favorite caster to use. 

Coco and I are set for a rematch next week as we both enjoyed our game and have a better knowledge of what the other's army is like.  I don't think he'll roll as cold as he did today nor I as hot so it should be a good game.

Great to see a lot of the guys enjoying 50pts and Scenario Play too on the other tables.     

Saturday, July 2, 2011

Warmachine Batrep: pIrusk vs Mortenebra

"the Game of Inches"

Played Jim a few weeks ago pitting pIrusk against Mortenebra.

Khador
pIrusk
Dog
Assault Kommandos (max + 2 Flamethrowers)
Kayazy Assassins (min + UA)
Widowmakers
Widowmaker Marksman
Gorman

Cryx
Mortenebra
DeathJack
Harrower
Seether
Slayer
Slayer
2 Sirens (can't recall if that's their names)


Deployment

My center has AKs with Gorman (their unofficial UA), Sprigg, and the Bears.  Irusk and the Dog at the back.  For this game I used for the first time a min unit of Assassins.  Feels so weird!  Being smaller, my plan is to use them as a flanking force.  In the pick I've deployed them pretty wide.  Widowmaker group on the opposite side.  My feeling as the game started was I have no idea if my center will hold.  AKs don't seem like they can withstand all those 'Jacks.  So if memory serves me, I will buy time and let my flankers go around and hopefully get a caster kill.  Definitely want Sprigg and Bears lined up with DJ. 

Jim deploys in football formation with all his guys packed in the center.  He told me afterwards that his plan here is to rush straight towards Irusk and not get distracted or slowed down by flankers. 


(pic above) I think I went first.  I move up real slow like.  Assassins not used to the flank go REALLY wide.  So wide that I can't even get Iron Flesh on them!  First lesson of the day.  So Iron Flesh goes on the Kommandos who may have had Shield Wall.  Check out Bears in the open on the left!  Gorman is being played by the Mechanik today.  Sprigg also doesn't have any tarpit in front of him... Widowmakers stay back and I believe the marksmen went up the flank.

Jim gets the Harrower (the one with the Harpoon) next to the building and DJ in some cover.  Morty stays back and one of the slayers is calling out Khador, "Bring it on!!"  (the one with his arms wide)


Hmmm, maybe I went second...  The Harrower harpoons one of the Bears and kills him.  DJ and the rest of the 'Jacks advance all the while using a combination of Overrun and Terminal Velocity.  It's scary stuff.  AKs are dying in the center.  Poor Spriggan.  First time using him.  Forgot to use grenades and I let him get attacked by DJ.  He goes down quick. 

I'm STILL sending the Assassins wide.  My thought was... lol I don't even remember.  I know I didn't want them to get charged but man are they out in right field.  Should have just ran them around the building and start putting on some pressure. 


(pic above ) Gorman runs over to the group of three 'Jacks and Jim finds out the hard way what happens when you bunch 'Jacks with Gorman nearby.  Black Oil goes on all three!  Feat by Irusk who puts Battle Lust on the Bears.  Inhospitable ground to make it EXTREMELY difficult for those 'Jacks to move.  Bears charge DJ and rolling sweet damage dice but it isn't enough-- nearly kill him bringing down his movement and cortex.  Barely got his arms hanging on.  Widows take some shots too.  At this point I send in my flankers trying to set up as many threats as I can next round.  Assassins on the right, the Marksman up top.  Widowmakers with lanes on the left.  I'm even thinking of running Kommandos around the center.  All I've got to do is survive...


Jim responds by spraying a few assassins with his Sirens.  DJ eats the Bears, a Kommando and his healing like there's no tomorrow.  Three Helljacks advance really close to Irusk. 


With Jim's army finally breaking through, this is my last shot.  I go for the assassination.  Assassins run in but only one manages to engage Morty.  Marksman advances closer and takes a shot but with -4 for cover misses.  On the left 3 widowmakers move up to shoot and do a fair bit of damage on Morty.  She's still not down.  Then I see that Irusk has a lane!!  First I activate my AKs and one manages to get a gas grenade off bringing Morty's DEF down by 2.  Irusk activate and raises his gun ready for two boosted shots!  The range is tight so I make sure that I'm right on Irusk and let Jim check Morty.  All I need is 10"!  I glance up to see Phillip's eyes go wide and mouth drop.  Irusk drops his gun too when he realizes he's less than a 1/4 inch short!!!  Wow.  /Knock Out Wind.  After all the damage done by the Widows, we both guessed that Irusk's shots would have been enough.  His gun is fairly good at POW 13. 


Jim sends in the Helljacks to finish the job.  Irusk still can't take his eyes off of Morty and the shot that fell by inches. 

Of note is my assassin leader standing in the middle of nowhere who got "seduced" by one of the sirens. tsk. tsk. tsk. 

Game to Cryx and an unbelievable game at that!  So things that I learned:

-Need a plan for my troops.  I had no plan for the Assault Kommandos and didn't think about the role they would play.  They can't really crack 'Jack armor so they have to tarpit; but not just slow the Helljacks down but prevent my hard hitters from being charged/attacked themselves.  There was no one in front of Bears and Spriggan and they took it pretty hard.  Should have had the Kommandos in front of them to take a charge and counter charge with Bears/Spriggan. 

-Flanked too wide.  Assassins arrived a turn late.  Had I had them closer they would have hit on time and been in range to receive Iron Flesh, a buff they really needed against the Siren Spray.  Having a Min unit is okay but I miss the full unit.  You can do a lot more with them and if you take casualties you can still bring the pain. 

-first time using Gorman and saw what Black Oil can do.  He's gotta get close but has stealth to protect him until then.  In later games I used him with AKs to help debuff their targets.  He's also immune to their fire.  Great to use with them. 

-Irusk was out of position to buff his army.  I should have had him on the right of the AKs so he could buff the Assassins.  Need to keep him in the center of the formation more, especially so more guys can benefit from his feat. 

I'm liking this Irusk army and AKs are really hard to use but I enjoy learning with them.  Will probably try to get Irusk, Sprigg, and the Kommandos painted next.  Assassins will take a while to convert.

Army tweak I've done is bring Assassins back to full strength and take out the Marksmen and the Dog.  @ 50 pts :D lots more I can add... and have to buy :( 

Playing Warmachine on Vassal


Played some Warmachine online today on a program called Vassal.  It's basically a program that has all of the models and pieces for you to play with, but you still gotta know the rules.  Interface takes some getting used to but there's a User's Guide in Vassal's menu.  Progam got the O.K. from Privateer Press as well.  How cool is that? 

Took my Khador and played against a fairly new player like myself.  Lupercal has been playing since October of last year.  I took this list:

@35
pIrusk
Spriggan
Kayazy Assasins (max + UA)
Assault Kommandos (max + 2 Flamethrowers)
Widowmakers
Gorman

He took:

pLylyth
Typhon
2 Seraphs
Striders
2 Deathstalkers
Forsaken.

I won the roll and deployed up top so I could use the forest for cover.  AKs were on the left and Assassins on right.  I wanted the Assassins to have open ground to run and engage.  Widowmakers deployed in the forest.  Everyone else sort of in the middle.

Lupercal deployed with Beasts and Lylyth on the right opposing my Assassins and the Striders and Deathstalkers on the left. 

It was my 2nd time using the AKs.  Well, I don't know if playing online counts.  Lupercal said he's never played against them before. 

The beginning of the game had me run up my Assassins towards his beasts and the AKs marched down the field on the left in Shield Wall.  The Widowmakers stuck to the woods for a few rounds while the Spriggan advanced around the right of the tree line.  Bears went behind the Assassins.

Lupercal moved his guys up as well and not much going on for the first round. 


Above shows a few rounds later.  I run up my Assassins to try and engage the Heavy Beasts.  Widowmakers advance a little to get some shots on Lylyth and do no damage.  Gorman runs around the shack to try and help against the Beasts and I send the Bears to the left to help the AKs.  The Kommandos are doing well against the Striders who are able to hit them but have a hard time with DEF 18 in Shield Wall.  The flamethrower manages to catch a few of the Striders by aiming at the back of one of his own Kommandos.  Striders with reform are really cool.  After their activation they can advance 3".  Lupercal used this tactic to hit and then fade back. 

I popped feat and Legion attacked.  A Seraph took two free strikes from Assassins to reach the Spriggan but wasn't able to do much to his armor.  Meanwhile the Forsaken moves up and does some kind of AOE blast but only manages to kill a Widowmaker and an Assassin.  4 tough rolls made because of Irusk's Feat needing only 4+.  Typhon tries to get rid of the pesky Assassins and unleashes 3 spray attacks.  He only manages to kill maybe 2 Assassins.  Others missed or made their tough rolls. 

Striders swing right because my forces are closing in.  Gorman is protected by Stealth and the Striders take aim at DEF 18 Widowmakers.  Forest is great for them. 

Underboss uses Killstroke and 2 Assassins reach Lylyth with Battle Lust on them.  Spriggan takes care of the Seraph on him and another three Assassins charge Typhon.  It takes two to bring him down doing a lot of damage because of the feat and charge + gang + Battle Lust.  2 Widowmakers with aiming bonuses shoot at Lylyth but again aren't able to damage her-- should have taken the 1 wound because of sniper. 

Assassins attack Lylyth and surprisingly with MAT 9s because of gang, they both miss!!!  They would have done an ungodly amount of damage on Lylyth if they were able to hit.

Gorman walks up to the Striders and Black Oil's them bringing their Def down to 11.  AKs move up needing 6s to hit and with a flamethrower spray take a few down. 

Bears head down and get ready to leave the forest. 

Lupercal resigns on his turn.

A really fun game against a cool guy who I'd be more than happy to play again.  It's fun to play again another new player because they are patient usually (and really helpful too).

Lupercal said he was planning to break through with his beasts and all those super tough rolls really sealed the deal against him.

Surprisingly the AKs faired well against the Striders.  The Flamethrower gives some added range and with Gorman and Black Oil, the AKs should be able to hit when they reach the enemy.  Mix in the Feat with +2 MAT/RAT and an Assault and Battery from the AKs would be really nice.  They suck balls against high ARM but against moderately low DEF/low ARM, they can really shine.  Marching up in Shield Wall is slow but against the right enemy, they can outlast the gunfire.

Was able to hold the Bears in reserve the whole game which is a good thing I guess.

Assassins were awesome against the Beasts.  With a low RAT, Typhon had a lot of trouble hitting Assassins with Iron Flesh even with boosting.  That coupled with the Feat and super Tough and the Assassins can hold.  Wondering what would have happened if the Beasts trampled out?  Lupercal was saying that I had Bears in the woods who would counter charge and that was true.  Also, I'm seeing that on the charge and Battle Lust, 2-3 Assassins per Beast should be enough to bring them down.

Getting more practice with Irusk and I like what he does for his infantry.  You can give them defense as you approach with Iron Flesh and when the decisive attack is ready, pop feat for +2 MAT/RAT, +4 Tough, and no knockdowns.  What that does is boost your accuracy for the attack and then gives you a chance to weather the counter attack with +4 Tough Rolls.  Battle Lust on the right unit will also do a lot of damage because of the extra die.  So find a good position, attack, weather the storm, and then attack again. 

Wasn't able to use Inhospitable Ground but can see how that would make moving/charging really difficult against the Khador army.  Inhospitable Ground basically making all the open ground in Irusk's control area rough terrain. 

Liking Irusk and think he will be my next Caster.  I have all the models in this army so I can use it in real life too :)

Sunday, June 19, 2011

Warmachine Batrep: pButcher vs pNemo

A week ago, Ben and I squared off for another match of Khador vs Cygnar.  Ben had a new strategy taking what he learned from our first game and created a "Death Ball" of Electricity with the Thunderhead and his Stormblades.  I usually write down what happens on a piece of paper but I lost it so this will be from memory.  His list was something like this:

pNemo
Thunderhead
Hunter
Squire
Arlan Strangeways
Arcane Tempest Gunmages + UA
Stormblades + UA
Stormtower + Grunt

I was trying something different proxying Beast-09 and taking some Manhunters to go along with Yuri.  Not the usual "Strong Center" I usually have with 2+ 'Jacks but I wanted to get some experience with flankers.  My list:

pButcher
Beast-09
Widowmakers
Widowmaker Marksman
Mechaniks (4)
Great Bears
Kayazy Assassins (max + UA)
Yuri
Manhunter x2

I won the roll and deployed first putting the Widowmakers behind the wall and Yuri and friends near that forest.  My plan was to get them in the trees where hopefully they could counter attack the center when Ben pushed forward.  Beast and the Mechaniks were front and center with Butcher and the Great Bears behind them.  On the right I had my Assassins.

Ben got his guys into a formation that he devised-- Thunderhead in the center with Stormblades in front to protect it.  He advanced deployed his hunter behind the house on the left and had his ATGM on the right with the Stormtower just behind his wall. 

Turn 1

Everyone runs for Khador-- Widowmakers hop over the wall to get some shooting lanes on the center.  Yuri and friends push and shove each other as they try to fit in the forest.  Everyone else moves up slowly and I shift the Great Bears behind the Assassins.

Ben moves everyone forward and puts Disruption Field on the Thunderhead and Electrify on the Stormblades-- if I hit them, I'll take a hit myself and get pushed back. 


Turn 2

My forces head for the center.  Widowmakers take down one or two Stormblades.  Ben counters with his Hunter who shoot two of my Widowmakers.  The forest on the right proves to be too small and Yuri gets shot to pieces while the two manhunters flee the trees heading back to the main Khador force.  Not sure but Beast could have taken some damage.  He's going to get shot up on the way to the Cygnar line.


Turn 3

From the look of the pics, it appears I went second.  Ben kills the remaining widowmakers leaving just the Marksman left.  At this point, I'm trying to figure out how to deal with the Thunderhead Ball of Doom.  If I charge it and attack the Stormblades, I'll get electrified and pushed back.  Then on the next turn Ben will Pulse with the Thunderhead and I'll lose all my infantry.  I decide to send a handful of Assassins forward as a sacrifice while I get my other forces in position to charge next turn.  I use Killstroke to get the Assassins deep into the Cygnar forces.


Turn 4

Ben takes care of my Assassins with his Stormblades and clears out the center with a Pulse from the Thunderhead.  Beast-09 goes down without contributing too much to the fight.  I also forgot to advance him after he took ranged hits TT.  Ben sends his ATGM all down my right flank and we've got a familiar sight-- the Khador force being slowly surrounded!   

I counter with everything that I have and leave just two Stormblades left.  Things look grim as I know that Ben is going to walk his Thunderhead down and pulse all of my infantry.  It isn't going to be pretty.


Turn 5

But wait!!  Ben decides to go for the jugular and sends his Thunderhead to charge Butcher!  Sitting on 5 focus he boosts his "to hit" rolls and boosts for damage.  By some miracle Butcher lives to fight on taking minimal damage.  With full focus camped Butcher was sitting at Armor 24.  Ben and I had to double check multiple times because that just didn't seem right.  In hindsight Ben said that he should have parried his Hunter out of melee with the Assassins and taken some armor piercing shots at the Butcher before the Thunderhead charged.  That would have been good.

I lose all my infantry in the center taking shots from the ATGM and the rest of the Cygnar army. 

On my turn I feat and Butcher rips apart the Thunderhead.  Over on the left near the house, two Assassins charge the Hunter and take it down while another Assassin charges Arlan. 

All I have left now is the three Assassins, the Widowmaker Marksman, and Butcher.  Will it be enough?


Turn 6

I lose all my Assassins to gunfire and the ATGM move towards the center.  Ben moves his Stormtower closer ready to attack next turn.  Nemo moves over to the right flank to safety.

At this point I'm considering putting Iron Flesh on Butcher to up his defense but I felt there wasn't time and he might take shots from the ATGM; better to have sick armor.  So I decide to go for broke and in glorious fashion run Butcher into the fray backed up by the Marksman. 

The Marksman takes a shot at the Stormtower taking out the operator; just one more shot needed next round to take that thing down. 


Turn 7

I never imagined I would be alive this long. 

Ben moves his ATGM more towards the center while the Marksman takes down the Stormtower.  One threat neutralized.  Meanwhile Ben has been taking shots at Butcher and needed to roll insanity with dice -14 for damage from his Gun Mages.  Holy Moly!  Slowly we both realize that nothing can penetrate Butcher's armor.  I run him right into the thick of the ATGM getting into melee and thinking that if he shoots at Butcher, he'll have to risk possibly shooting his own men! 


Turn 8

Ben takes down the Marksman and proceeds to surround Butcher and take shots at him.  Nothing is working and in the past few rounds have only taken 3 or 4 damage.  Ben runs Nemo behind a wall but leaves a charge lane for Butcher.  With reach he is able to attack and with 6 focus is able to clobber Nemo and win a suprising game for Khador.


Ben had the game won.  For me, it was one of those agonizing games where you know you're just going to lose.  Ben strategy of the Thunderhead Ball was really strong.  I had no easy was of assaulting it as whatever I sent at it would get Pulsed in the next round.

Ben cleared out the center of my formation and could have easily Pulsed the remainder of it but instead decided to go for the win with the charge against Butcher with the Thunderhead.  It looked good actually as the Thunderhead had 5 focus but wow, armor 24 is hard to beat!

The lesson I see in our game is knowing what to do when you have an advantage-- you don't have to take risks.  In fact, the other player is the one that has to take some risks (like an assassination run) because they're the one that's playing from behind.  What I think Ben should have done was Pulse what was left of my infantry and then go into the End Game with both the Thunderhead and the Hunter.

What we learned was that those two 'Jacks were the only things that could really threaten Butcher.  Nothing else could penetrate his armor easily.  So here's the strategy:

In this particular matchup, Khador wants to eliminate those things that can hurt Butcher in the end-- the Thunderhead and the Hunter.  Then, after the majority of the Cygnar forces are taken care of, he can come out and dominate the field. 

Cygnar on the other hand, wants to keep his anti-armor alive to threaten Butcher while they slowly pick apart the Khador force using their guns and tactics with the Thunderhead's Pulse. 

Ben will probably run this list again as we both feel it's really strong and next time I'm going to have to figure out a way to win and tackle the Thunderhead Ball.  GG Ben!

Saturday, June 11, 2011

Khador vs Retribution: pRayvn vs pButcher

Jay and I met for another game of Warmachine over lunch yesterday.  We both tweaked our lists trying to guess what the other would be bringing.

pRayvn (I'm guessing it was the prime version but not sure)
Sentinals + UA
2 Griffon Light Jacks
Mage Hunter Assassin

From my recent emails to the group, Jay predicted I was going 'Jack heavy and brought an all melee list.  Iron Sentinals made up his infantry.  His plan was to use the Mage Hunter Assassin and the two Griffons to flank around and pressure Butcher.

pButcher
Juggernaut
Wardog
Kayazy Assassins (max + UA)
Yuri the Axe

The last time we met, I went against a Retribution force that ignored Line of Sight and could see through concealment.  I expected Jay to try that list again so I brought something different.  I brought fast units with the Kayazy and Yuri, both having stealth.  So even if he could bypass LOS he would still have trouble spotting stealth.  My plan was to race the Kayazy up and pressure the Caster with a Kill Stroke threat.  I also wanted to use Yuri to flank around and threaten an assassination.  If that wasn't possible I would send him in to Thresher infantry.  Butcher would walk up the field as usual and go for an end game win.

Deployment

Jay won the roll and elected to go second so I deployed Kayazy in the center with Juggernaut on their left and Butcher and the Dog next to him.  The battlefield had an open center; perfect for my Kayazy and marching army. 

Jay deployed towards my right stacked all together with his Light 'Jacks on the outside of the formation and Rayvn in the middle of the infantry. 

I deployed Yuri on the far left ready to storm down the flank.  Jay forgot to deploy his Mage Hunter Assassin :0


Deployment
Turn 1

Khador 1 2 3 go!  Everyone runs.  Kayazy spread out (habit) and run for the center.  Juggernaut follows on the left with Butcher and the Dog behind.  Yuri moves down the flank, threatening the left of the Ret infantry line.  Oh wait...

Rayvn and the Sentinals boost the left Griffon which allows him to move before activating.  This gave him a bigger threat range than I anticipated and the Griffon smashes into Yuri killing him.  There goes my flank!  The rest of the Ret force moves up to the wall and the other Griffon eyes the other flank.  Not a good start for me.

End of Turn 1
Turn 2

I spent some time here thinking about what the Assassins should do.  It looked like only one or two would make a charge and I'd face a big counter charge on the next turn by the Sentinals backed up by Rayvn.  This is when Jay gave me the advice of the game: "How about pulling back and waiting?"  I liked the sound of that. 

Butcher moves up and casts Fury on the Kayazy as they shift left and fall back.  One of the Assassins charges the Griffon on the left but misses his attack.  Juggernaut stays where he is. 
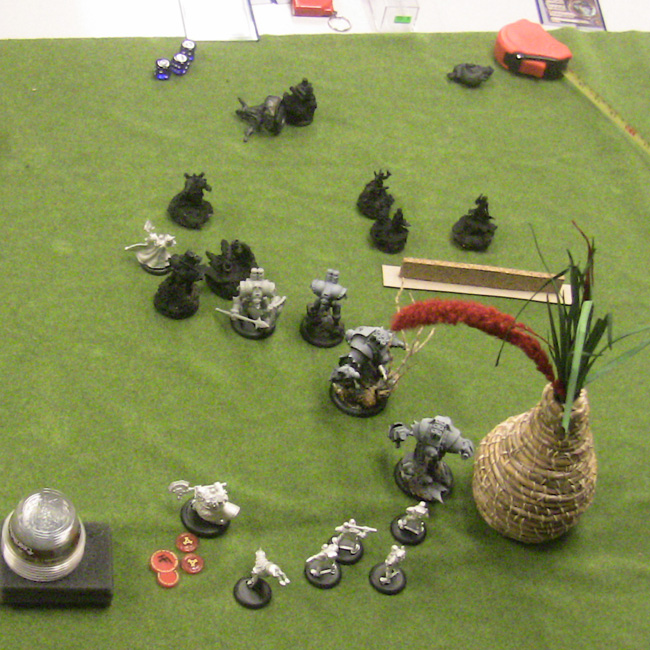
At this point I realize my infantry is more mobile (Kayazy SPD 6 vs Sentinals SPD 5) so shifting position seems okay.  I didn't like assaulting over that wall so I try to put some pressure on the left and take out the Griffon.   

Jay brings the Sentinals out running to the aid of the Griffon.  He keeps them in groups of three which I thought was a very cool tactic as when they are B2B (base to base) they get an armor bonus.  Rayvn goes with the Sentinals.  The Griffon on the right rounds the wall threatening my right while the one on the left attacks the Assassin but misses two attacks.  Rayvn casts Vortex of Distruction, allowing friendlies in her control range to get boosted attack and damage rolls in melee (I could be wrong though but it's something like that). 

Jay realizes that he forgot to deploy his Mage Hunter Assassin and brings him in on the left behind the Salt and Pepper towers.  He runs him deep on my left looking for his angle on the Butcher.   


End of Turn 2

Turn 3

Time for the Kayazy to show their mettle!  The two Assassins on the left slip off the Griffon and run past the Sentinals reaching the back of the Ret formation!  The rest run across the field and engage all of Jay's infantry.  Some Assassins are outnumbered 2-1 and it is a sight to see.  Both Griffons are tied up and the Assassin Leader and the Underboss are behind the front line trying to keep safe.  The rest of my force move up ready for a second wave hit.  On my next turn I'm threatening Kill Stroke with my Assassins and the Juggernaut and Butcher are in charge range. 

Jay spends a long time thinking about his next moves.  He has to neutralize all of my threats and get his guys in position for a counter attack.  Rayvn activates and dances through the Sentinals killing the Assassin Leader and then moves to kill the UA.  Without him I won't be able to Kill Stroke.  Rayvn attacks and the Underboss takes full damage.  He Toughs.  She attacks again and from the ground the Underboss Toughs again!  Still with attacks Rayvn goes for another hit and this time the Underboss goes down.  Kill Stroke neutralized.  Rayvn falls back over the wall.  But even without Kill Stroke, my Assassins can still advance into Rayvn so Jay has to take care of them.  Sentinals activate.  Three charge a lone Assassin on the right but all three miss their attacks (Assassins sitting at DEF 19 in melee!).  The Griffon on the right decides to take a free strike instead of trying to hit the Assassin and takes some damage but runs down the right and gets really close to Butcher. 

On the left, the Mage Hunter Assassin is weary of Butcher's Dog and advances just outside of the Dog's counter-charge range ready to attack next turn.

The rest of the Sentials take swings and most of them miss (needing something like 12s on three dice).  The two Sentinals fighting the Assassins in the backfield miss and even the other Griffon who gets a backstrike bonus misses.  After the dust settled, I lost half of my Assassins which is pretty remarkable.  They're amazing in melee and never before have I seen what they can really do.  

Rayvn unleashed a heroic attack killing the Underboss and taking away Kill Stroke.  The Sentinals along with a Griffon rallied next to their Caster blocking charge lanes for my Assassins.  It was epic!  But there was still an opening left to Khador and one threat left on the board-- Butcher.


Turn 4

Butcher keeps all of his focus and charges across the field reaching Rayvn.  This is the moment.  I've got to win the game here.  Surrounded, Butcher feats and swings on the charge with weapon master doing 5D6 of damage.  With a mighty swing of Lola, Rayvn takes a massive hit and falls.  Butcher wins the day for Khador.

 
Definitely an intense and thrilling game to play.  I was really impressed with the Assassins.  They dodged so many attacks it was unbelievable.  My big lesson with them is if you can get them into melee against the right unit, wow, they can tie them up for a long time.  Also, with parry, you can slip away and run deeper into the opponents line, tying up more things and threatening the caster.  Not to mention you always have the threat of Kill Stroke.  With the Assassins, you also don't have to worry about taking a charge because they still have to hit them and when they do they are dead anyway, boosted dmg or not.  Sometimes it's good to charge but other times it might be best to run so you can get them tied up in melee.   

I have to keep track of threat ranges and make sure my guys are safe on the advance.  Sorry Yuri! 

Another thing was the Dog-- defenitely did a good job of making the Ret flankers think twice before getting close to Butcher.

The final thing I learned and wanted to note was Jay's golden advice--"falling back and waiting."  I've never really done that before with Khador and this game showed me that it can payoff to be patient.  If things don't look like it's in your favor, fall back, shift and wait for a more desirable position; then when the time is right strike and strike hard.  Thanks for that Jay, and thanks again for another great game!  Looking forward to our next match.  Will be tweaking my list ^^  

Wednesday, June 8, 2011

pButcher vs pNemo

Khador vs Cygnar @ 35 points.  Ben is my Warmachine buddy and tonight played in his second game bringing pNemo to the table.  He was running:

pNemo
Thunderhead
Hunter
Thorn
Charger
Junior Warcaster
Arlan Strangeways
Black 13th
Squire

I was running Khador with:

pButcher
Juggernaut
Marauder
Kodiak
Wardog
Great Bears of Gallowswood
Kayazy Assassins (max)
Kayazy Assassins Underboss
Battle Mechaniks (6)

I won the roll and chose to go second so I could react to Ben's deployment.

Ben contemplating his deployment

He put the Thunderhead on the front line along with the Thorn all set to arc node and the Charger.  On the back line, Arlan and the Hunter were on the left, Nemo, the Squire and JR in the middle with the B13 on the right. 

I put my three 'jacks in the center with mechaniks behind them.  Bears, Butcher, and the Dog are behind the Mechaniks and the Assassins on the right. 

My plan is to run the Assassins forward to tarpit and engage the Cygnar front while my big hitters run up behind as a second wave.   
Deployment
Turn 1 the B13 move to the wall and get Arcane Shield from Junior.  Thunderhead and the front Light 'Jacks move up.  Disruption Field goes on the Thunderhead.  Electrify goes on the Hunter as it runs up to the palm tree. 

Khador responds by running like mad.  Assassins take the center with Iron Flesh.

End of Turn 1
Ben gets his AOEs ready and the B13 leap over the wall and shoot the Fire Beacon at the Kayazy hoping to expose their stealth but miss!  It lands right in front of them.  Ryan (of B13) shoots Mage Storm which also misses and scatters in front of the Kayazy right next to the Fire Beacon.

The rest of Ben's forces move up but he forgets to attack with his Thunderhead!

Mage Storm vanishes and the Kayazy run forward.  Three manage to engage the Hunter, Thorn, and the Charger.  The rest of the Khador force runs up behind.


End of Turn 2
With the Khador tide getting closer to his lines, Ben sets up a devestating attack.  Arlan uses his special to pull the Thorn out of melee, freeing up Nemo's arc node and allowing him to conjure up Chain Lightning on an Assassin.  It misses!  Needing to roll 10s he goes for another Chain Lightning and rolls a hit!  A bolt strikes an Assassin and arcs to two more killing all of them.  Nemo follows up casting Locomotion on the Hunter moving him back 1 inch, avoiding free strikes with parry.

B13 take aim and strike with Mage Storm and kill A LOT OF DUDES.  Another B13 snipes an Assassin.  The last shoots at another Assassin but it misses and hits the Charger but luckily does no damage.

Ben sensing that the Thunderhead was in danger backs it up to safety and blasts the Juggernaut as the Assassins charge.

One charges into the Hunter and cripples his melee arm.  Another runs behind the Juggernaut and reaches Ryan (of Mage Storm fame) but wiffs on his attack.  The Kodiak runs up to help and ties up Ryan in melee.

Great Bears run forward.  Butcher gets Iron Flesh going to 19 DEF and the Marauder runs up with Mechaniks behind after making a lot of repairs on the Juggernaut.     

At this point I'm getting ready charge with my second wave.  I'm pretty surprised that I have Assassins left.  One thing that I've got going for me is I have all of my heavy hitters left-- 3 'jacks, Great Bears, and Butcher sitting with Iron Flesh and Focus and the Dog.  Just gotta reach his line!


End of Turn 3
This is the big turn 4.  B13 abandon Ryan for dead and retreat but not before taking a shot at the Kodiak.  It takes some light damage followed by Mage Storm from Ryan.  The blast doesn't penetrate the Kodiak's armor but it kills the Assassin. 

Meanwhile on the left flank, Arlan repairs the Hunter as the Charger lights up the Juggernaut crippling his left arm and his movement.

Thorn falls back and Butcher sees the Thunderhead advancing right into their formation.  "Here it comes!!"  The Thunderhead attacks with his Pulse Special killing the rest of the assassins.  The Juggernaut crumbles to the ground as the shockwave hits the Great Bears.  Kolsk takes a hit and TOUGHS!  Volkov braces against the impact, stumbles, and TOUGHS!  He turns to see Yarovich hit by the mighty blast.  TOUGHS!!!  Ben eyes go wide and immediately darts back, "That's Bull $#!7!!!!"

Butcher senses that this is the time for a little Blood Frenzy!  And now with fire in their eyes the Great Bears charge!!!  Kolsk reaches the Hunter and misses his first swing.  He comes around again for a second hit and nails the Hunter for crippling damage.  Volkov and Yarovich hit the Thunderhead HARD crippling first the Thunderhead's cortex then it's movement.

The Marauder charges into the Thunderhead, eyeing the Hunter behind him.  Rolling with Full Throttle, the Marauder hits his Combo Smite and smashes the Thunderhead back, wrecking it completely.  It lands just shy of colliding with the Hunter.

The Kodiak looks down and sees Ryan, her gun still smoking from her last Mage Storm shot.  He swings with his fist and finally takes her down.


End of Turn 4
Still with a lot of fight Ben activates the B13.  They take a shot at Kolsk on the left.  He toughs!  Ben responds quickly with another, "That's Bull$#!7!!!"  Lynch takes a shot at Yarovich and this time, Yarovich falls.

Arlan quickly repairs the Hunter getting its gun back online.  The Hunter parries away from the annoying Kolsk and shoots Butcher with a boosted attack.  Misses.  Damn.  Dice -12.  Ben says, "It's over Prime..."  (Megatron quote)

Charger charges forward and hits the two Bears in the middle taking out both Yarovich and Volkov.

But then things start to unravel for Ben.  His Junior Warcaster with Rat 4 misses Kolsk.  Nemo Feats and misses the attack on the Marauder.  He Chain Lightning attacks the Wardog hoping to bring down Butchers DEF but at dice -4, rolls a 4 for no damage.  And with that, Ben concedes the game.  GG Ben!!

Position at End of Game
After 5 hours of playing, our epic match finally game to an end.  Afterwards, we both said that the turning point was the tough rolls made by the Great Bears.  Oh they are legendary.  It allowed them to stay alive and charge the Thunderhead on the next turn.  Without that, we weren't sure if the Marauder would have been able to finish the Thunderhead off.

This is the first time that I've seen the greatness of the Bears and wow, if you can get them into melee, they can wreck a lot of face.  You can't really count on the tough rolls but when the dice are on your side it can turn the tide of the game.

In the initial turns, it looked really grim for Khador with two huge AOEs being put down not to mention the threat of the Thunderhead's Pulse Attack.

But the Juggernaut, for some reason, soaked up a ton of damage and the Assassins did what they were supposed to do and allowed everyone behind them to clash with the Cygnar line.  Butcher was also able to enter the End Game relatively untouched and ready to do what he does best-- be crazy scary.

We both had a blast with this game and we'll both be tweaking our lists for the eventual rematch.  Some things I learned from this game:

-Feels like 3 Jacks might be too much.  Besides the big Combo Smite, the Marauder and Kodiak didn't do too much.  I might need just one of them.  Instead of the Marauder, I'm thinking of brining in Yuri, a Manhunter, and Widowmakers.  That'll give me some fast flankers to go along with my slow advance; Yuri and the Manhunter hopefully being able to hunt solos and be a distraction.  The widowmakers will also give me some range and more options to hit solos.  I could also bring in a calvary solo instead of the Widowmakers which sounds like fun.  But I do feel I need something fast along the flanks to give me more tactical options.  Right now all I can do is pretty much slow advance-- Assassins in front, Heavies behind.      

-My Mechaniks always get left behind after a repair.  I might have to stagger them up the field, to prepare for future repairs. 

-Combo Smite is REALLY POWERFUL.  The Marauder's basic attacks aren't too bad either hitting at P+S 16s.  Haven't really used the Kodiak's throw but right now I'm leaning to the Marauder. 

-Juggernaut always takes concentrated fire as the army advances.  Just before he reaches the lines, he gets destroyed.  Phillip says he gets attacked because he's the only one painted lol. 

-Kayazy Assassins.  Love this unit and can see myself using them for a while.  So many things they can do from tarpiting, being monsters in melee, hard to hit, and they also have assassination possibilities with Kill Stroke. 

My next list might be this:

pButcher
Juggernaut
Marauder
Wardog
Great Bears
min Mechaniks
Widowmakers
Yuri the Axe
Man Hunter